Monday, June 25, 2012

Etched State Art Tutorial & GIVEAWAY!

Hello everyone visiting from Sew Caroline! I’m Brittany. I started my blog as a means of keeping in touch with friends and family back home after I moved 1,409 miles away from my home state. Now I blog about DIY projects, my thrifty finds, décor, organization ideas, and the occasional recipe.

I’ve shared my love of maps and travel-related décor many a time here on my blog, so I thought it’d be fitting to feature a project along those lines in this post. So without further adieu, let me present my etched state print, with the how-to below & giveaway info below!


Isn’t it lovely? And it’s pretty easy to create! Here’s what you’ll need:


  • One frame (any size, but I recommend 5x7 or 8x10 for one state and 8x12 or 11 x 14 for two). I like to buy good quality frames at thrift stores; even if they’re a little ugly, a bit of spray paint freshens them right up, and they’re cheaper than buying new ones!
  • Digital craft cutting machine (like a Silhouette or Cricut) & vinyl OR a printout of your state of choice, clear contact paper, & an exacto knife
  • Etching cream (I use Armour Etch from Michael’s—it costs $12 for 10 oz but you’ll have plenty left over after this project!)
  • A foam brush
  • Decorative scrapbook paper or fabric (Note: originally I wanted to use a fun fabric to back my etched state, but then the etching didn’t show up! So instead I replaced it with a solid colored scrapbook paper. So, I suggest sticking with a solid paper or fabric.)
  • Your cat. (JK, not required, but my cat kept photobombing this shot.)

Start by selecting what state you want to etch. I chose Missouri because it’s my home state and I have a lot of MO pride!

If you’re lucky enough to own a digital cutting machine like the Silhouette or Cricut, at this point you should buy the silhouette of your chosen state to use with your machine. If you don’t have one of those nifty devices, don’t fret—you can still do this by hand! You’ll just need to find a silhouette of your state online. A simple Google Images search will do.

Those of you with the magical machines can now use them to cut your state silhouette onto your vinyl. Use clear or another color that you don’t mind etching over. Make sure you size your state properly so that it fits in the frame with plenty of background glass still around it. (I made mine around 5x7 for my 8x10 frame).

Those of you doing this by hand should copy and paste your state silhouette into Word, size it accordingly, print it out, and, using your exacto knife (or scissors if you’re a good cutter or your state doesn’t have many intricate details), cut out the outline of your state. Now cut a piece of contact paper large enough to fit the state. Take your paper template of the state and trace it onto the contact paper. Cut it out, and you’re done making your vinyl for etching!

Now’s the easy part. Remove the glass from your picture frame, and wash and dry it. Make sure it’s very dry.

Next take the vinyl state you created with your cutting machine or your contact paper and remove the sticky backing. Place it where you want on the frame (I’m a front and center kind of girl, but maybe you want it to be a little asymmetrical?) Press down the edges of the vinyl very firmly—you don’t want any of the etching cream to leak under the state.

Once you’ve firmly placed the vinyl, grab your etching cream and brush it evenly over the frame’s glass.


Wait 15 minutes or as directed according to your etching cream or spray. You want the cream to set enough that you won’t smudge it when pulling up your vinyl. After the allotted time has passed, remove the vinyl and admire the prettiness!


Let your glass set overnight. Then the next day, grab your pretty paper or fabric, measure the glass, and cut the paper or fabric to size. Pop in the glass with the etching cream face up, then place the paper or fabric, then top it off with the back of the frame! Voila! You can now rep your state in a pretty way!


Do you like it? Enough to make one of your own? Well I’m giving you the chance to do just that! That’s right, you have the chance to win your own state (or country) silhouette vinyl so that you can create your own etched print! Note: just the vinyl—you’ll have to grab your own frame & etching cream :)


To enter, visit Caroline HERE and follow the instructions!

And if you're not visiting from Sew Caroline, I encourage you to check her out!


First of all, she and her husband are adorable. She sews adorable things (and just started up an awesome pattern review series!):


She shares delicious recipes:


She DIYs:


And wears the cutest outfits!


And if you are visiting from there, welcome! Here are a few of my favorite projects that you might like to check out :)


I hope you'll stay a while!


Pin It!

Wednesday, June 20, 2012

Tales of Four Paint Fails (or, as my husband kindly put it, "Learning to Paint!")

Disclaimer: I am by no means (like, really, NO MEANS AT ALL!) an expert at painting rooms, as this post should let you know. I am not looking for pity or consolation in posting this--I clearly acknowledge that all of this was my fault!--nor do I need affirmations of my clear idiocy when it comes to painting :) I am only sharing these fails in the hopes that other paint newbies can avoid my horrible, amateur mistakes! If you're looking for people who are good at painting, try Young House Love!

I sit here writing this post covered in paint flecks. My hands are blistered from gripping the roller. My brain is fried from inhaling paint fumes. I've just spent the last two hours in our bedroom trying to remedy a major paint fail.

I should've also titled this post "Blogger Fail" because I committed the cardinal sin of blogging: I undertook a makeover project without taking in-progress pictures. "Everyone knows how to paint a room," I thought. "I won't be writing a whole post on painting. I'll just show regular old before and after pictures to demonstrate how much the room has transformed!"

HA old self! So funny! Not everyone knows how to paint--least of all me! I am kicking myself for not taking those in-progress shots, because after a few huge paint FAILS, I want to share how to avoid the mistakes I made (and how I fixed them!) So you will have to embark on this relatively pictureless tale with me with your imaginations in full force!

To refresh, here's the post on our whole pad's color scheme, and here's the state the bedroom was in prior to all of the painting madness:


It was a greeny-gold color my husband affectionately referred to as "Earwax." (Maybe now you see why I was so keen to tackle this room first).

We headed to Lowe's a few weeks back to pick up paint for our rooms--we had them color match a Martha Stewart shade, Natural Twine, for the bedroom. It was here that my first major Paint Fail occurred: I came totally unprepared to the store, without having really researched the paint brands or measuring to find out exactly how many cans of paint I wanted. I realize that this was an incredibly stupid thing to have done, so no need to leave a comment reiterating what an idiot I was :)

As a direct result of Paint Fail #1 (no count of how much paint to get), Paint Fail #2 occurred--rather than buying more than one gallon for each room, I bought one per room, even though I fully knew that the living room would take more than one. "That way I won't be overbuying paint!" I thought. "I'd rather get too little than too much--don't want to waste money, and they can always color match it again!"

Um, NO, old self, just because they have the color code on file doesn't mean that the paint color will be an exact match. I found this out the hard way. After painting the whole room, I needed another gallon for a second coat, and I sent my hubs out to buy it. I put it on, and BOOM--horrible! The colors did NOT match, and it was totally all my fault. A simple internet search revealed that most paint experts confirm that even the same shades mixed on the same day will mismatch slightly, and that the best plan is to mix equal parts from both gallons to ensure color homogeneity! So gallon #1 was a little more gray-brown, while #2 was more tan-brown, as shown here in the closet:


The closet is still a mess because I didn't have enough paint to redo it, and I'm not about to buy more--so it'll get repainted with leftover from the living room (if I have any!) or done in a whole new color. I'm learning! Also, Fail #3, I forgot that there was a shelf that goes in the closet, so even if I had successfully painted it, it would've had a mismatched green shelf!


If you're thinking of quitting here because you can't take my dumbness anymore, that's cool. Please stop now and come back another day when I hopefully won't be spouting off my failures!

Moving on. My one smart move in the painting was to save some of the paint from gallon #2 to do some touch-ups. This meant I had enough to go back and cover the problem areas where gallons #1 and #2 were warring. Luckily, this was only in 3 large patches, and a few other smaller spots in the room. Once I poured most of the remainder into the pan, I had just enough paint to fix my boo boo.

Great, right? NO. Are we reading the same post? Duh, this is all about how much I suck at painting! Like a dummy, I committed Paint Fail #4 and used a roller that I'd used when painting with gallon #1...which meant that some of the old gray-brown paint was lingering on there. So when I spread the tan-brown paint of gallon #2 on the patchy spots, remnants of the gray-brown paint from the roller also hopped on the wall. Thus things were worse than they were before! AHHHHH!
I allowed myself to lay on the floor for one minute of pity-wallowing, then got my booty up and problem solved. (Of course, I was focusing so single-mindedly on this that I completely forgot about taking some "before" shots of the Fail. Sorry.) With a trusty brush in hand (and a new roller), I dug the last dredges of paint from the sides and bottom of gallon #2, spread them over the problem areas, and used the roller to smooth them out.

The Paint gods were taking pity on me, because I magically had just enough paint to remedy those areas--and now the room is looking good despite some major hiccups. (It's not yet blog-worthy, though, and won't be fully awesome until we have all our furniture--but I'll still share a look before then, of course!)


There are several morals to this paint horror story:
  1. NEVER go to the store without having calculated how much paint you need! Lowe's and Home Depot both have estimators to help with this--just measure the room and input its size, and boom!  
  2. NEVER under-buy your paints! It is better to have extra on hand in case you need it!
  3. ALWAYS mix equal parts of your paint gallons if you're using more than one to paint a room. (We'll certainly be doing this with the rest of our paint!!!)
  4. NEVER use dirty rollers when painting! Wash them promptly after you're done, and let them dry before using them again. Throw them out when they get crusty.
  5. ALWAYS listen to your husband's advice at the hardware store. (Ha ha! But seriously. He told me to buy 2 gallons but I didn't listen...and I'll never live that down!)
  6. NEVER allow yourself to get to stressed or down on yourself when DIYing! We're all human and we definitely all make mistakes--it's how we learn :) I know I called myself dumb a lot during this post, but I'm just kidding--and I didn't dwell on my mistakes during the crisis, I just forged on and tried to make things work. If they hadn't, well, then I'd be planning how to cover up those patchy areas with gallery walls and furniture :) Mistakes are made, problems occur, and we have to roll with the punches and deal with them! I try to do so with a smile on my face.
So there you have it. My Paint Fails. 

Do you have any to share? C'mon. Can't be as bad as mine :)


Pin It!

Tuesday, June 19, 2012

A New Addiction: the Goodwill Outlet!

On Memorial Day, my mother, sister, & I headed out to do some serious thrifting. We'd never been to a Saver's before, so we went to one about 20 minutes away from home.

I came away with a few fun finds, but more importantly, with the knowledge that a famed Goodwill Outlet had opened up in Kansas City!!! You see, the Saver's had a Goodwill conveniently located across the street, and when we popped in there I noticed flyers announcing the new store. Score!

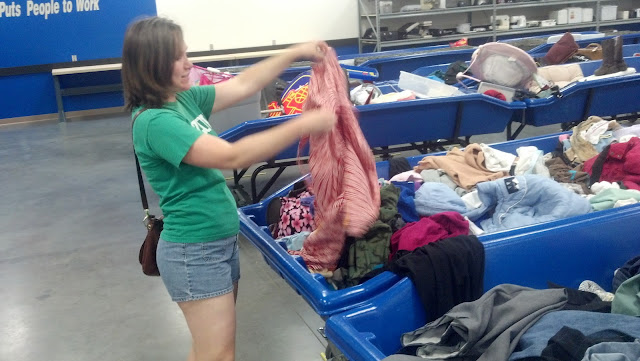
For those that don't know, at the Outlet items are priced by the pound (save for electronics and furniture. And at our store, the prices on those items are reduced by 50% everyday, meaning you can often get huge bookshelves for just $0.25! Woah!) Glassware is $0.49/pound, while everything else is $0.79/lb. All the items are placed in bins (loosely sorted/categorized--some are mostly clothes, one is all glass, and others are just a random hodge podge) that are rotated hourly. People do tend to get crazy after the rotations--sprinting toward the new bins and pulling stuff out of them like there's no tomorrow, wielding shopping carts like shields to keep you out of the aisle!


Now, all I know about Goodwill Outlets has been learned via blogs like Chelsea's and Rae's. Many people warned that Outlet finds, while fabulous, also tend to be super dirty or even WET! (Ew). So  Megan, Brandon (her hubs), and I all wore fashionable rubber gloves on our maiden voyage.


We arrived right at 9 AM (the store's opening) to a short line. I almost expected people to break out in a run when the doors opened (blogs also warn of over-eager, pushy shoppers), but everyone was fairly-mild mannered. And once we started digging in the bins, we quickly realized that our gloves were not needed--everything seemed fairly clean! Phew!


We gravitated toward the glassware, books, and electronics on our first trip (and most thereafter), but of course we scope out every bin to see if there are any treasures to be had! 


Bahaha, I can't get over my brother-in-law's face in the picture above. He's a great Outlet hunter, though!


So far, we've had lots of luck on our four trips. Here are some of my favorite finds I've brought home.


This rusty guy is a vintage aluminum foil holder! I spied one on a blog some time ago, fell in love, forgot about it, and remembered that love when I hit up the Outlet!


I couldn't resist these fun papergoods. The Christmas Album is filled with classic songs--I plan on framing my favorites and the cover for some fun holiday art! I also loved the two recipe books--the meat one will probably be out as kitchen decor year round, while the turkey one will be great for Thanksgiving!


I love the vintage books--one's a typewriting textbook and the other is a kid's dictionary (For Boys and Girls!) The cards appear to be a piano practice tracking card--the kid or parents wrote how much they practiced, and the piano teacher verified it? I just loved how they looked--such pretty handwriting!


I also grabbed 2 large atlases to craft with! I want to make one of those ubiquitous map heart art projects. And maps would make great bunting, no?

Lastly, when digging through the glassware bins I scored some of the older style Pyrex refrigerator dish  lids. Of course, they didn't have the dishes to match, and they aren't a full set, but I scooped them up nonetheless! I also found a casserole lid, which is good to have on hand since I buy lidless Pyrex if I love the pattern enough!


Ryan has even found some great deals--a pair of new roller blades (exactly his size, and the same brand he skated in when he played hockey!), some flood lights, and a travel DVD player (he plans to take out the screen to use in some project). The other day he even remarked "We need to go to the Outlet more!" Good thing he supports it, because I made a silly pronouncement that I want to go to the Outlet at least 30 times before we head back to Missoula, and so far we have gone every week (and sometimes twice), so maybe that will actually come true! (Technically we always go during a rotation--so it's almost like going twice since I see new items!)

Have you ever had an Outlet experience? Do share!


Pin It!

Thursday, June 14, 2012

Where I've Been

I apologize for the lack of posts this week, lovely readers! You see, the busyness of life has gotten in my way a bit and kept me from blogging. I did have a post scheduled for yesterday, but as some of you may have seen, when it published it was empty and now the post seems to have disappeared  (???? What, Blogger?). So I'll just share the craft studio floor plan next week.

For now, I figured I'd share a few updates on what I've been doing that's kept me from blogging. All of these projects/events will be blogged about in full soon...so this is sort of a preview of what's to come!

Lately, I've been working hard with my sister so we can launch our vintage rental and party craft business (more on that here):

{our blog banner}

{some of our inventory}

And taking plenty of trips to KC's new Goodwill Outlet with my family, Ryan, and my sister-in-law:

{we're hams, we know.}

{bahaha, check out my brother-in-law posin' for the camera.}


{spray painting so many things at once takes a while, y'all. but here's a sneak peek of a few things that are finally finished}

Prepping to paint our bedroom and bathroom, which included lots of spackle, tape, sanding, and wall-washing (painting to occur today...or this weekend...):


Cleaning messes and recreating them each week:

{studio space relatively clean in preparation for bachelorette sleepover!}

{messy again after an inventory photoshoot, some sorting, and many Goodwill Outlet trips}

Scoring many new Pyrex gems:

{yes, I realize I'm addicted}

Preparing to launch a vintage store on Storeenvy--here are some of my wares:

{see, I don't always keep everything I buy!}

Visiting Columbia to help my best friend prepare for her wedding (their puppy helped, too):

{check out how cute these lacy mason jars look! can't wait to share details of their wedding after the big day}


And spending time with my family:

{roasting hot dogs at Ryan's house}

{every year we attend KC's Scottish Highland Games--photos courtesy of my mother}

Whew! So that's what's been keeping me from this little old blog. Sometimes I don't know how big name bloggers balance so many home projects plus jobs and raising their kids. Even though it's summer, I feel like I have a fuller plate than I do during the school year--funny, right? But I don't mind because so many exciting things are happening, and I can't wait to see where they lead!  I'm definitely a point in my life where I have room to go for it, which I'm thankful for.


Pin It!

Pin It button on image hover