Wednesday, March 21, 2012

Baby shower crafts!

Last Saturday (St. Patrick's Day) I attended a baby shower for my friend Kate from my graduate program! She's due in May and the MFA girls decided to throw her a shower. We're all giddy for her and can't wait to meet her little guy!

Of course, I couldn't resist making a few decorations for the partay. Call me crazy, but after making 96 tissue pouf balls and 100+ pinwheels for my wedding, I kind of missed folding paper...

Here are some pictures from the event--see below for the DIYs!

The adorable invitations are from Paperless Post--a great way to send cute and classy e-vites.

Orange and blue were the event colors--everything was so bright and cheery!


We had a delicious spread--macaroni and cheese, spinach & cheese frittata, pasta salad, mango salsa, spinach & artichoke dip, carrot cake, and a fruit rainbow!

To make the rainbow, I just cut up and arranged strawberries, clementines, mango, pineapple, banana, kiwi, green grapes, blueberries, and red grapes.


I also made my own version of these baby rattle marshmallow pops. I made white candy melts and added some sky blue food coloring, then put the marshmallows on cake pop sticks, dipped them in the candy melts, and sprinkled some rainbow non-pareils on top. I placed them in a cake pop stand from Wal-Mart (in the specialty cake decorating aisle--near the party stuff).

Now for the DIYs. I'm not the first to explain how to make either of these crafts--the wonderful Martha and Paper Source taught me all I know--but I made a few alterations to their tutorials, so I figured I'd still share!

To make the tissue paper flowers, first layer your tissue paper. I decided to use multiple shades of the same color on my flowers, so I layered the orange, then the peach, then the orange, etc. until I had layered 8 sheets total (4 of each color). For the blue flowers, I used 3 different shades of blue, so I layered the dark, aqua, and light, then repeated until I had layered 9 sheets total (3 of each color).


After I was done layering, I folded the sheets accordion style, then tied them in the middle with clear jewelry string (sorta like fishing line--find it in the jewelry aisle in your local craft store). Next, I cut the ends of the tissue paper to create the "petals." You can experiment with different cuts to create different shapes. I moved about 3 inches down from the top and swooped over to the top.

Once they're cut, the last step is to pull apart the layers of tissue paper to create the poufs. I like to fluff half the sheets on one side, then turn it over and fluff the rest.

Then return to the middle and fluff until the ball is spherical.
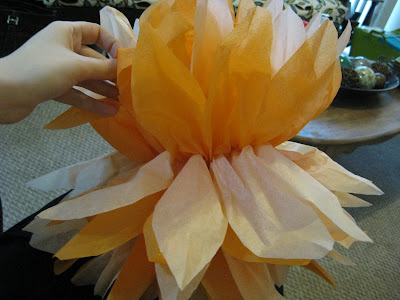

For my wedding, I (and my awesome bridesmaids) made 96 of these bad boys and used 12 sheets on each for a fuller flower, but these ones with 8 sheets turned out beautifully, too! I'd say 8-12 sheets is the amount you should go for. If you want to make different sized flowers (I did for my wedding!) you need to cut the tissue paper down to a smaller size before you fold it.

I also made these pinwheel bouquets:


Very easy and similar to the tissue flowers, except instead of layering your paper, you just fold one piece accordion style.


Once you're done, take the ends of the paper and tape them in the back so that the paper forms half of the pinwheel. Do the same on the other side to form a whole pinwheel. To make different sized pinwheels, use different sized papers. The larger ones were made from 12 x 12 pieces of scrapbook paper that I cut in half. The smaller ones are 12 x 12s cut into thirds. Medium-sized ones are about 2/3 of a 12 x 12 sheet of paper. For my wedding, we covered 2 large bulletin boards with many sizes and colors of pinwheels, so I made larger ones by folding entire sheets of 12 x 12 papers and tying them together.

Once I'd made the pinwheels, I glued them to different sized dowel rods to create the "flowers" of varying lengths. Now the pinwheels live above our memo station:


Lastly, I made two pennant banners for the party. For this one, I just bought scrapbook paper, traced triangles on the back, cut out the pennants, and taped them to some orange baker's twine.


I designed the "Happy Shower!" banner on Word. I just added triangle shapes with letters in them and printed it all out on a free chevron background from Sprik Space.


I made some of the partygoers pose with the banner before we left:

Overall, we had a great time at the shower, and I loved making the decorations!


Pin It!

Monday, March 19, 2012

My Happy Wall

***Update 4/23/12: After several requests, I've added a sources list to the bottom of the post so that you can find all the prints I have in my gallery wall! Thanks for checking in!***


I have a love/hate relationship with blog giveaways.

I love them because it's amazing that all the bloggers out there take the time to arrange them because they love us, their faithful readers. It's awesome to get the chance to score a Silhouette machine or a pretty print from Etsy or a fabulous camera bag!

I hate them because I always enter them and never, ever win, and then I'm plagued by the desire to go and purchase the giveaway item. (Sometimes I cave. Sometimes I hope someone will buy me them if I hint enough. **coughcough custom Missouri art from CuriouslyWrought coughcough**).

But now my scale is tipped toward the LOVE side because I actually won a giveaway! Yeah! Amanda from Our Humble A{Bowe}d was cool enough to host a giveaway from Block Party Prints, and this girl, #11 (my lucky number, no less!) WON!

So once the hubby and I had agreed on a print (pretty easy--we have fairly similar tastes!) and it arrived in the mail (along with an adorable note, business card, and a free bookmark!)...


...I knew exactly where I wanted it to go--in our kitchen on what I like to call My Happy Wall. Basically, it's a collection of cheery prints that fills up the previously awkward blank space above our sink. Cheery prints in terms of color (sunny yellow and bright blue) and message. Because our dishwasher sucks and I have to hand wash everything, so a reminder to Be Happy is a complete necessity.

I took my winning the print as a sign that I should finally get on rearranging the frames--a task I'd put off for, you know, five months or so. Back when I started the wall, I only had 3 prints, and it slowly grew and grew as I accumulated more--and the wall started to look a little too chaotic for my tastes:


So down came the frames & up went the templates, all traced on scrap pieces of paper. I moved them around til I got an arrangement that tickled my fancybones (yes, that's a thing), then hammered through the templates, swapped em out for frames, and voilà! My Happy Wall was complete!


Here are a few different angles of Happy Wall hamming it up for y'all:


And why not? I'll throw in a few more of our kitchen...I think it's vastly improved since I cleared away some counter clutter and settled onto a more unified color scheme:


For more pictures of our place, check out the newly-updated Apartment Tour!

What do you think of blog giveaways? Have you ever been a lucky winner?

Linking up to Thrifty Decor Chick's "Show Us Your House," Kitchen Edition!

Gallery wall sources, starting at lower left corner and working up and down:

  • "Don't Worry, Be Happy" print--created myself. Will post as a free download to my printables blog ASAP. (I added a little paint chip bunting to the frame, also DIYed).
  • Yellow B--letter purchased at Joann's, yellow scrapbook paper from Michael's adhered with mod podge.
  • "You are my Sunshine" sunflower print--Block Party Prints
  • "I Love Us" print--FREE from Eighteen25. I mounted it on some blue scrapbook paper and the FREE gray chevron background from Sprik Space.
  • Photo & striped mat--purchased the frame w/ mat at Target years ago (bet you could DIY it easy, though!); the picture is an engagement photo by Kristine Paulsen Photography.
  • "Let the Beauty We Love Be What We Do" print--The Wheatfield
  • "What I Love Most About My Home" print--FREE at Eighteen25
  • "Keep Calm and M-I-Z Z-O-U"--found FREE on Google Images
  • Blue & pink floral print--Raceytay
  • Blue R--letter & scrapbook paper purchased at Joann's, paper adhered with mod podge.
  • Yellow floral print--purchased at Target (at least 5 years ago)--I'm sure you could find similar options on Etsy.
  • "Always Radiate Sunshine" print--Erin Jane Shop
  • Ferris Wheel print--Raceytay
  • "Think Happy, Be Happy" print--Kiki Creates (I cut it out and mounted it on yellow scrapbook paper)
  • All other frames were purchased from Wal-Mart or Michael's.


Pin It!

Friday, March 16, 2012

Fab Finds Friday: Animals & Kitchen Edition

This week's fabulous finds are brought to you by Ross and TJ Maxx, two of my main suppliers. I love them both so. They're great places to find inexpensive but stylish decor--especially picture frames of all shapes, styles, and sizes--and high-quality name brand cooking stuff! Lately I've seen a ton of Calphalon utensils and bakeware (the Calphalon Classic line), as well as Kitchenaid utensils and gadgets. I pop in every now and then to snatch up things--usually stuff from our registries that we didn't receive, but that aren't so super essential that we haven't purchased them yet. Tip: before you buy yourself any fancy pants kitchen stuff, try checking TJ Maxx, Ross, or Marshall's for them!
Without further ado, here are my latest fab finds:


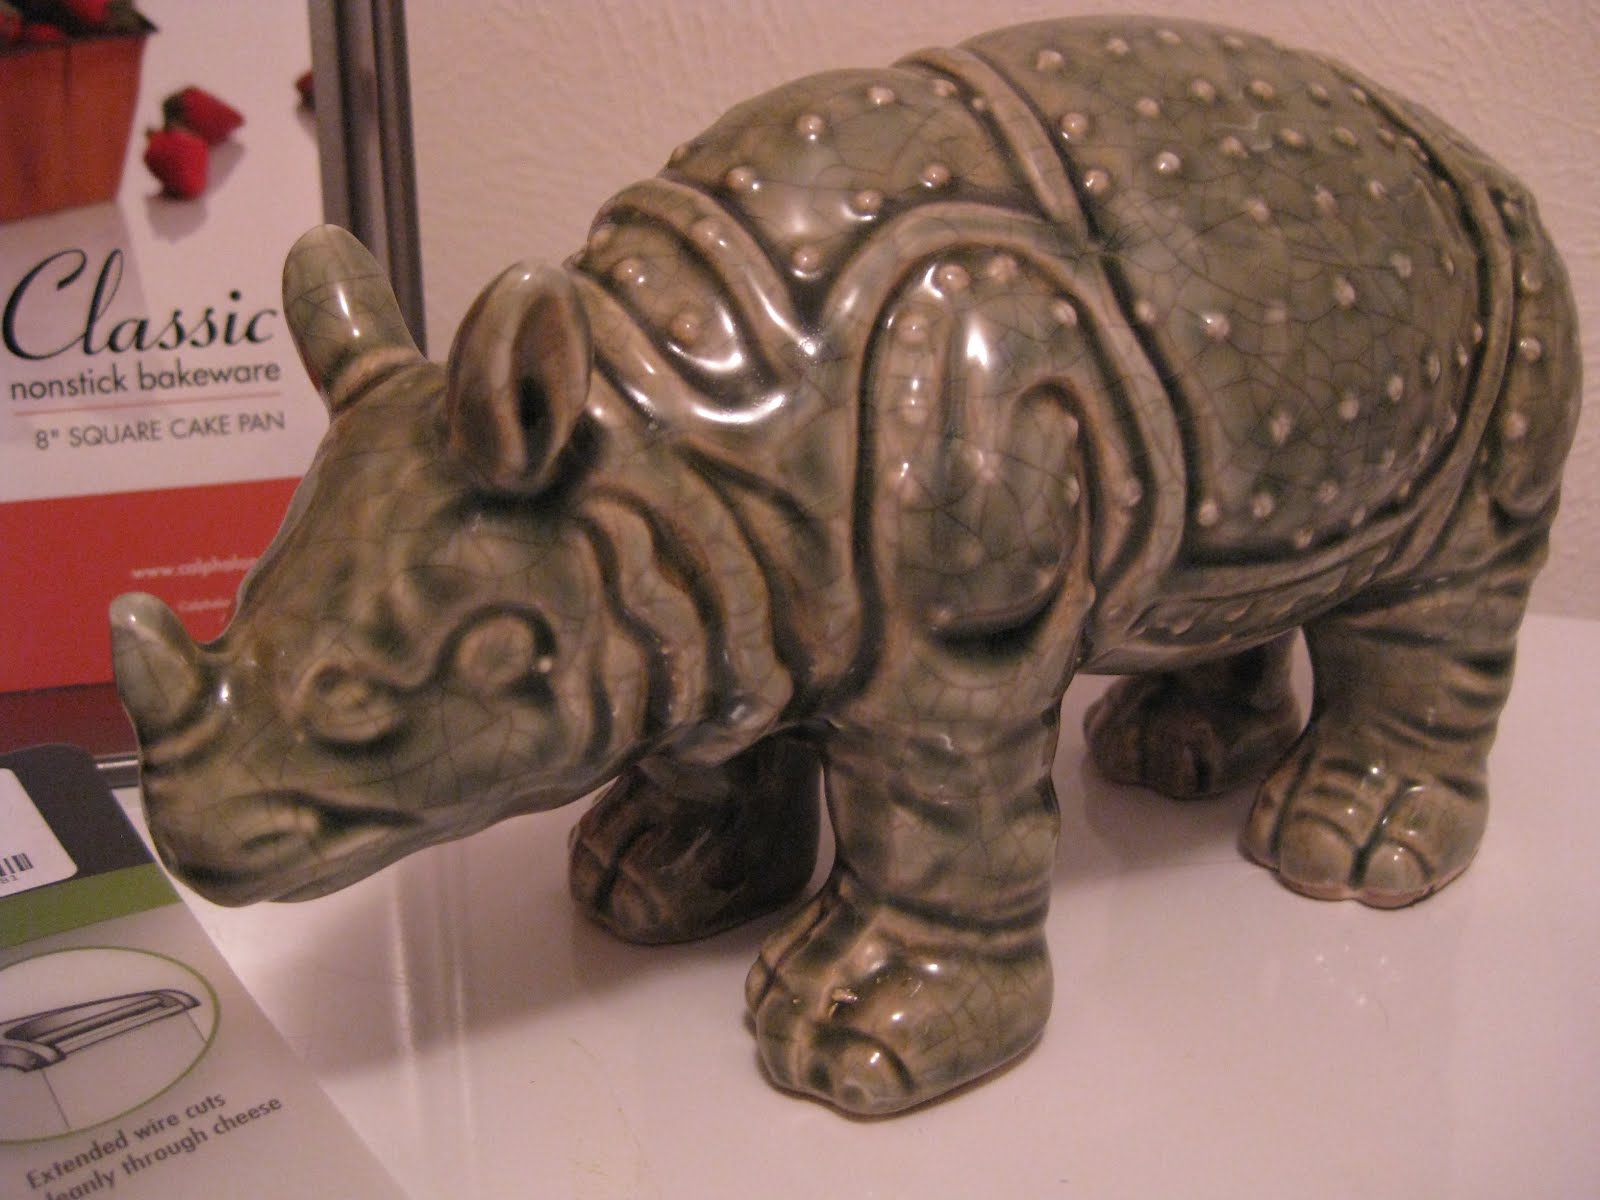
1) Greeny-gray rhinoceros statue from TJ Maxx, $5.99. In late January, I spotted a white ceramic rhino hanging out with an elephant friend at Ross:
But at $14.99 a pop, I thought they were just a bit much, and I didn't have a home in mind for them. (Sherry from Young House Love probably would have slapped me silly for leaving them behind, given her white ceramic animal obsession. Amanda, too. Except they're too nice to slap, and they probably would've rejoiced and snatched the animals up themselves, but whatever.) So this time, I couldn’t repeat history. $5.99 seriously? He was MINE!
And I loved that the green guy was just like the rhino Sherry & John have. Obviously it’s trickled down since the first super-expensive version $3480 came out (and even since YHL found their ZGallerie version). I’m not the biggest fan of the color, but plan to spray him a glossy white this summer.
2) Calphalon cheese slicer from TJ Maxx, $6.99 ($12.11 at Amazon).
I love cheese. And I love Calphalon products. I’d already bought the brand’s Dual Plane Cheese slicer (also from TJ Maxx) earlier this year, and an awesome friend got us this amazing slate cheese board as a wedding gift, so this guy just completed my cheese serving collection. The Amazon ratings aren't great, but I'm wondering what sorts of cheese the users sliced--the product description clearly states it's for "semi-soft cheeses like mozzarella, Havarti or Port Salut," and that there's a Lifetime Warranty for regular use of the product. So I'm planning on using it only with soft/semi-soft cheeses and cashing in the warranty if needed.
3) Off-white antique-y looking birdie from Ross, $3.99.
I kind of have a thing for birds in decor--see the photos of our living room as proof--and this little guy just called to me. I like the brown glaze on him, and the detail is pretty great for less than 4 bucks!
4) Calphalon Classic nonstick 8” square cake pan from TJ Maxx, $7.99 ($17.00 at Amazon).
I can’t resist snatching up the Calphalon bakeware when I see a piece we don’t already have and will use. It’s a great product at a lower price than anywhere else, and since the inventories at the stores changes so often, it probably won’t be there next time I go! I love the nonstick pans so far—can’t wait to bake more with them.

Have you found any great deals lately? Do you love Ross and TJ Maxx as much as I do? I'd never even heard of Ross until we moved here, and now it's one of my favorite stores. I'm so happy that they're opening one near my hometown in Missouri soon :)


Pin It!

Wednesday, March 14, 2012

Pinterest Challenge Project: Scrapifying our Wedding Cards


As you can probably tell from my most recent DIY projects and my weekly menus, I'm kind of a Pinhead. Whenever I'm jonesing to try a new recipe or make something pretty, Pinterest is my go-to source. It's like a digital mecca for all of my crafty/culinary/design needs.


So when two of my favorite lady bloggers--Katie from Bower Power and Sherry from Young House Love, along with Cassie from Hi Sugarplum and Erin from The Great Indoors--declared another Pinterest challenge, I knew I had to throw down.


Thus, I turned to my "Gotta craft this" board and looked through my lengthy to-do list. I'd been itching to do something with our wedding and shower cards, and when I rediscovered this pin that I'd happened upon months ago, I fell in love all over again. (Sorry Ryan). I had to craft it!

So I grabbed our cards, a piece of cardboard, some coordinating scrapbook papers, double stick tape, scissors, and a hole punch, and set to work.


First I organized our cards from smallest to biggest and stacked them up real nice. (No picture for that step--it's pretty self-explanatory). Then I measured and cut out cardboard to create a front and back cover for our book. Next I covered the front and back with my scrapbook papers. I wanted an eclectic look, so I used different papers and shapes on each side of the cardboard. I applied them with the double stick tape.


Then came the hole punching. The most tedious part of the whole shebang. I completed the arduous task while watching a train wreck watching the Bachelor finale. (Oops, I hope I don't scare anyone away by admitting that I like low-brow reality television...) To make sure all my holes lined up, I just took the largest card, measured and punched it at the halfway point, and then used it as a template for the next largest card. I placed the unpunched card behind the punched one, lined it up, and then punched away. (Does that make sense? I wish there were a good synonym for punch to interchange in that explanation...but nothing works because all of the synonyms for punching relate to violence!)


I made sure that the smaller cards would line up with the holes, too:


Once everything was decorated and punched (including the covers--I just used a scrap of punched out paper, traced it to the cardboard, and cut it out with an Exacto knife since the cardboard was too thick for the puncher), I grabbed some pretty pink baker's twine, stacked up the cards & covers, and threaded the twine through the holes.


One bow later, and I had this lovely book full of our wedding cards. And I think it's pretty darn cute. I like that I can just grab the book, flip through it, and see our loved ones' well wishes.


I just have to share a picture of one of my favorite cards...hilarious. #2 is very true.

And the inside:


All in all, I love how it turned out!


I've made it a goal to complete 10 of my pinned DIYs by the end of this year, and so far I'm trucking along nicely--I've made paint chip wall art (inspired by Sherry herself), a paper pinwheel wreath, and painted up some spoons! Plus I adjusted some existing artwork to copycat a lovely bedroom gallery wall. Have you conquered any project that you've pinned lately?


Be sure to check out the fabulous Pin-spired projects from Sherry, Katie, Cassie, and Erin, too! Thanks for hosting, ladies!


Pin It!

Pin It button on image hover