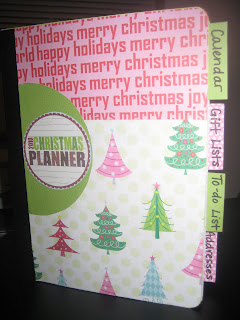
The sisters at eighteen25 lay out a very clear step-by-step process for assembling the planner, so head there if you want more details on the process. Here are some snaps of my final product:

For my cover, I used some Christmas paper I'd bought at Hobby Lobby years ago. I simply traced the scrapbook paper to fit the cover and glued it on. The "Christmas planner" label is from the downloadable planner template at eighteen25. I made the tabs out of extra scrapbook paper; I cut out squares, used double-stick tape to adhere them to the notebook paper, then cut out a rectangle of paper to cover up the tape exposed on the back.

I also papered over the inside cover of both the front and the back of the composition book. Then I took some small manilla folders, cut them in half, and papered those as well. The front cover has two envelopes for my coupons, and the back has two envelopes for my receipts. The "my coupons" and "my receipts" labels are again from the downloadable template.

For the calendar portion of the planner, I downloaded a free monthly template from calendarlabs.com as well as weekly calendars. I went ahead and printed out months and weeks for 2010, 2011, and 2012, as I anticipate using this notebook in those years as well, given that there are many pages.

For the addresses section, I created my own headings on Word. Since pink, green, and red are the main colors in my planner, I used those colors in my design. It's great to have all these addresses in one place as I prepare to send out our super cute holiday cards from Shutterfly :)

So far I've copied most of my addresses, made a lot of gift and shopping lists, and jotted down some holiday crafts I'd love to complete!
Stay tuned for pictures of our holiday decor. Our living, dining, and kitchen areas are all decked out :)

this is adorable! love you and miss you pretty girl! <3
ReplyDeleteThis is so organized! I use my moleskine and it does bug me when a list is no longer relevant or out of date.
ReplyDelete