Friday, February 17, 2012

DIY painted spoons


The other day on Pinterest I came across this lovely photo:


It just so happened that I had recently packed away some of our wooden spoons when making room for some wedding gifts! So I pulled those bad boys out to make my own, more colorful version of the pinned picture.


It was super easy. First I rigged up a cardboard box destined for recycling to be a drying area. I didn't want any paint dribbling on my counters. So I just popped some clippy spoon rests (love them for cooking! Buy here) to the box so I could insert the painted spoons for drying.


If you don't have clippy spoon guys already, then you can also make something similar yourself out of a binder clip, paper clip, and some sort of ring. I used a carabiner, but a regular key ring would work too.

Next came the painting. I just cleaned the spoons, then dipped them in my bottles of craft paint. I went with a yellow, pink, and teal, but then decided I wanted lime green instead of yellow, so I redipped one.


To get a nice even coverage, dip the spoon handle in, press down hard, and swirl it around. It will be very drippy.


Go ahead and put it in the spoon rest, then take a paint brush and use it to remove the excess paint and do touch-ups. I used the bottom of the box to brush the extra paint away.


Let them dry overnight, and then they're ready!


My sister & I DIYed that crock with my Silhouette :)


It was such an easy project and I love how the spoons turned out! Best thing? I had everything on hand so it was 100% free! Gotta love that.


Pin It!

Tuesday, February 14, 2012

Valentine's Exchange!


I recently had the great pleasure of participating in a Valentine's Day swap hosted by Caroline (Good Times Never Seem Sew Good) and Alissa (Rags to Stitches!) I was paired up with the fabulous Gabriella (Two Peeps & a Pooch). We sent each other V-day gifts valued $10-$15!

Gabriella spoiled me so much, guys. Also, we must be kindred spirits, because she hit up Ross, and we know how much I love Ross around these parts. Check out my goodies!


What are these wonderful things, you say?!


1. Candies, including skittles, M&Ms, and conversation hearts! The skittles were promptly stolen by Ryan, but I did manage to nab some M&Ms before he wolfed those down :)

2. An adorable heart mug. Perfect for cocoas or a cup of joe :)

3. Valentine-sy kitchen towels! I feel like Gabriella either blog-stalked to see that I love decorating for the holidays in the kitchen, or she's just psychic. Either way, these are ADORABLE!

4. Heart shaped cookie cutters! Which I'm using this week to make some V-day treats for my class :) Again, she flexed her psychic muscles and intuited that I was going to have to buy some of these!!

5. A block of paper& a pen--perfect for writing love notes!

6. A sweet card!

Thank you so much Gabriella! I absolutely loved the gift and hope you liked yours, too! An thanks also to Caroline & Alissa for arranging the swap!

Happy Valentine's Day, everyone! I'm attempting a delicious homemade meal tonight...we'll see how that turns out!

Linking up to the party:

Photobucket


Pin It!

Sunday, February 12, 2012

On the menu

I decided to try a new method to motivate me to do 2 things: 1. blog more and 2. cook more new recipes. So I'm going to share what's on the menu in our household for the next week. I will make at least one new recipe per week, then share what I liked and what I didn't!


Sunday, February 12: Breakfast for dinner (pancakes, cheesy hashbrowns, sausage links, bacon, eggs).


Monday, February 13: Cornish game hens with garlic and rosemary. Also, it's our one-month anniversary :)


Tuesday, February 14: Special Valentine's Day Dinner! I'm attempting to make Ryan's favorite dish, Filet Oscar, which is a filet covered in crab, bearnaise sauce, and asparagus. Along with that I will make these smoked gouda mashed potatoes, these cream-braised brussels sprouts, these imitation Red Lobster biscuits, and some dark chocolate Ghirardelli brownies. Mmmmmm! This is a really ambitious meal plan and all are new recipes...crossing my fingers that it turns out okay!!

Wednesday, February 15: I have class from 3-10 on Wednesdays, so I don't make dinner those nights.

Thursday, February 16: Cheddar Beer Chicken. I'm going to use Boulevard Wheat for the beer--should be yummy!!

Friday, February 17: BBQ salmon for Ryan, Parmesan broiled tilapia for me. (I don't really dig salmon and he doesn't really dig tilapia, so I just make us two kinds of fish.)

Saturday, February 18: I'm hosting a Jurassic Park movie marathon, so we're being bad and eating lots of fried appetizer type foods.

Sunday, February 19: An old favorite, Chicken Tortilla Soup. Mmmmmm!

I'm excited to try all these new recipes and share my verdict with you!


Pin It!

Tuesday, November 22, 2011

Pinned there, done that!


Sorry for the cheesy title. I love puns!

For the past few weeks, I've been challenging myself to actually TRY the things I pin! (Gasp, I know!) So I thought I'd share the results of several Pinterest recipes, tips, and projects that I've tackled. (There are a lot of recipes on here...don't judge me, I like food!)

Pin #1: Easy Masumun Curry from Shugary Sweets.

The verdict: DELICIOUS! To cut down on calories I used the low fat coconut milk and it was still great! I was happily surprised that Ryan enjoyed the dish, too. I added a little bit of sriracha to the recipe because I love it, but other than that followed the recipe. I'll definitely make it again--it could probably be made in the crockpot, too.


Pin #2: Mississippi Sin Dip from Plain Chicken

The verdict: Another winner! I have a reputation for being the dip queen at parties here. I love to make "grandma dip" (my grandma's recipe), cheese dip (the typical rotel + Velveeta mix--why mess with what works?!), and spinach dip especially. But for a post-reading reception last weekend I decided to try out this Mississippi Sin dip, so named because it contains hot sauce (again, I used sriracha) and is sinful (i.e. not for the dieting sort). Judging by the amount I brought back home (not a ton), it was a hit. And I didn't mind munching on the leftovers, either.


Pin #3: Crispy Southwest Chicken Wraps from Mel's Kitchen Cafe


The verdict: A pattern emerges--yes, another yummmmmy recipe from Pinterest! I made this for lunch today (and another to heat up for lunch tomorrow) and oh my goodness it was delish. It satisfied my huge Chipotle craving (minus the lime rice, of course--now I just gotta try this pin) and it was pretty easy! I added a little salsa to the wrap, but it would've been great without it, too. Definitely repeating.


Pin #4: Easy way to clean the microwave from Crafty Little Gnome (what an adorable blog name!)


The verdict: :( I was so hoping that this would work. The blog suggested combining water and a dash of vinegar, then heating it in the microwave for 5 minutes. The steam is supposed to loosen up stuck-on foods, making it super easy to wipe away messes! Unfortunately it didn't work all the way for me. I tried 5 minutes and wiped and a few smaller stains came out, but most were still stuck. So I did 5 more minutes and tried again--same sort of thing. Some of the more stuck-on ones came off, but not all. I ended up dipping my rag into the hot water/vinegar mix and using it to scrub off the stains, so it didn't go to waste, but I still had to use some elbow grease. Alas!


Pin #5: Yarn wreath from Decor Chick


The Verdict: Judge for yourself!


I love my wreath and plan to change it up for different holidays. Of course I'll probably retire it after Thanksgiving and put up a more wintery wreath, but I definitely see myself pulling it out in the spring and adding some Easter-y embellishments, then some summer-y ones after that, and maybe some Mizzou ones for football season next year! The leaves, pinecone thing, and Thanksgiving bunting are all detachable. Decor Chick's is still more gorgeous, but I like my version too!


Pin It!

Thursday, October 27, 2011

All "Fall"ed Up: Halloween


For the past few weeks I've been getting our apartment all "fall"ed up for Halloween! I thought I'd share a few pictures. I'm listing where I got each thing under the photos. After Halloween, I'll switch some things out for Thanksgiving and share the changes with you again :)

Bookshelf:


Miscellaneous glass pieces: Goodwill, Ross, or on hand
Labels: Martha Stewart Halloween collection from Michael's
Keep Calm and Scary On: Craftily Ever AfterEat, Drink, and Be Scary: Craftily Ever After
Trick or Treat chevron print: Sprik Space
Chevron pumpkin print: Two Twenty One
Halloween subway art: Eighteen25
Boo! bunting: here (with white paper backing) and somewhere else...can't find the BOO one at the moment!
Halloween-y sticks: Target
Raffia pumpkin: Target (last year)
Lantern: Michael's (summer sale)
Candle inside lantern: Michael's
Candle next to lantern: Ross
Orange candle holder: Ross
Black glitter pumpkin: Michael's
Large white frames: Walmart
Black frame: Walmart
5x7 white frame: Target
8x10 white frame: Target
Beware: Target dollar spot

Coffee table:


Bamboo platter: Ross
Gourds: Walmart
Orange candle: Crate & Barrel
Wicker balls: Pier1
Pine cones: the great outdoors
Leaf napkin: Crate & Barrel outlet
Apothecary jars: set of 3 from Ross
Acorn vase filler: Walmart
Wood vase filler: Walmart
Mini pumpkin vase filler: Michael's


Side table 1:


Glass pedestal bowl: Thrifted
Potpourri mix: Walmart
Candle: Target
Candle tray: Thrifted
Green lamp base: Walmart


Side table 2 (aka our creeeepy bar):
Miscellaneous glass pieces: Goodwill, Ross, or on hand (My fave is the pitcher from Goodwill--it has a spooky quality to it!)
Labels: Martha Stewart Halloween collection from Michael's
White tray: Target
Spider: Target dollar spot

TV stand:


Pumpkins: Walmart
Halloween sign: Pier1 (last year on sale)
Large apothecary jar: Ross
Pillar holder: Pier1
Maize: Walmart
Pine cones: mother nature
Candle: Target
Candle holder: Thrifted
Scent jar: Target
Branches: Target
Blue/bronze vase: Ross
Quatrefoil votives: Carnation Collection
Bronze tray: Walmart
Orange candles: Target

Kitchen table:


Large mason jar: Michael's
Quart-sized mason jars: Thrifted
Acorn vase filler: Walmart
Wood vase filler: Walmart
Centerpiece mat: orange scrapbook paper with ivory lace vellum overlay from Michael's
Vase: Pier1
Wheat: Ross
Label: Martha Stewart Halloween collection from Michael's

Dining Room wall:


White frames: Michael's
Wreath: DIYed with coffee filters & Michael's flat wreath form
BOO hanging: Pier1 (last year on sale)
Halloween art: framed scrapbook paper from Michael's


Pin It!

Thursday, October 13, 2011

Cider Cream Chicken

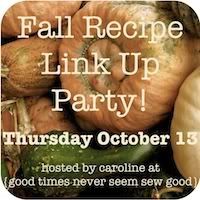
When I saw that the fabulous Caroline at Good Times Never Seem Sew Good was hosting a fall recipe party, I instantly knew what I wanted to make! It's one of our favorite dishes: cider cream chicken. MMMM. Who doesn't love cider in the fall?


Lemme tell you, the first time I encountered this recipe I was skeptical that it would be good--cider and cream and onions? What? But trust me, it's veeeeerrrry good. Just thinking about it makes me want to eat it up! Since I just made it on Tuesday night, I'll have to hold off for a while--so you all need to make it now so that I can live vicariously through you!


The best thing about this recipe (besides its deliciousness, of course!) is that you only need 6 dishes to make it: one dutch oven, one spoon, one knife, one cutting board, and two measuring cups. I don't know about you, but the less dishes to wash, the better!


If that isn't appealing enough to you, here's a picture:


Looks good, right?


So here's the recipe (serves 2):

PREP TIME:
10 minutes


COOK TIME: 40 minutes


INGREDIENTS:
  • One large thawed chicken breast. Make sure you thaw it, or you'll go to cook the dish at 5:30 and then realize that you didn't thaw the chicken and you'll be very upset that you can't eat the delicious food that night!
  • One medium onion
  • 1 tbls minced garlic
  • 3/4 cup of milk (or heavy cream or Half and Half if you want it a little creamier). We're on a diet so I made it lighter by using milk.
  • 3/4 cup of apple juice or cider
  • EVOO
  • Pam cooking spray
  • Tarragon (or Thyme will work, too. I've used it in a pinch).
  • Salt
  • Pepper
DIRECTIONS:
  • Preheat the oven to 400 degrees.
  • Spray the dutch oven with Pam or other cooking spray and drizzle the a little olive oil in there, too. (I started using Pam as a low-cal sub for olive oil per HungryGirl's suggestion and it usually works so well! Olive oil has a ton of calories, ick. I still add a tiny bit of oil to this recipe, though, because once I did all Pam and the onions stuck a bit.) Place it on medium low heat.
  • As the cooking spray heats up, halve your onion, then cut both halves into 6 pieces. When you've cut it all up, throw the onion in the dutch oven along with a little salt and pepper.
  • While the onions cook, prepare your chicken. Cut off all that nasty fat and dispose of it, and then cut the chicken up into pieces, around 1.5 inches long, until you have 10-12 pieces.
  • Return to the onions. By now they should be a little golden brown. Add the minced garlic and stir. Move the onions to one side of the ducth oven and give the free side another spray of the cooking oil. Turn the heat up just a tad over medium. Wait around 2 minutes for the oil to bubble.
  • Transfer the chicken to the dutch oven. Cook for around 3 minutes each side, until golden brown.
  • Pour in the juice/cider and let bubble for 2-3 minutes. Then turn off heat and add the milk/cream.
  • Sprinkle with salt, pepper, and thyme, then pop it in the oven for 40 minutes.
I like to serve it with couscous and buttery brussel sprouts. The cider cream sauce and sweet onions taste delicious on the couscous!


Now hurry up and grab yourself a jug of apple cider--you can drink some of it and make my recipe! :)


Linking up to Caroline's recipe party--head over there to check out some more delish dishes :)


Pin It!

Saturday, October 8, 2011

Cheap and easy spice shelf makeover

This week I headed to our local Goodwill in search of a purple dress to use for my Halloween costume. I'm going to be Ms. Frizzle from "The Magic School Bus," like so:

{via here}


Sadly, I didn't find a dress, but I did pick up several other goodies, including some cute "Flour" and "Spice" tins ($1 and $0.50, respectively), some assorted glassware (I'll show you project I used them in later this week!), and this lightweight wooden shelf:


You've probably seen shelves like these in many thrift stores. Usually people put little tschotskes in them, but I knew right away that I wanted to use them as a spice shelf. We have a dedicated spice cabinet (see this post for a picture), but it always irked me a little that we weren't really using all of the space in the cabinet. I figured I could place our most frequently used spices out in the open and take advantage of the cabinet more!

Of course, I wanted to gussy it up a little. The backing of the shelf was this dark green color that didn't really suit our kitchen color scheme, so I picked out some colorful scrapbook paper to coordinate, then measured the backing and popped the paper in! Easy as pie! I decided not to modge podge it so that I can easily change it out as desired, but if you're using paper that you'd want for the long haul, then you could seal it in. Obviously you can customize the color & pattern of the papers you use, too--I'm a bright and colorful gal, but that might not suit everyone's tastes :)


Ideally, I'd like to paint it white, but we live on the third floor of our apartment and don't really have any place to spray paint. (I'm a spray paint addict. I'll admit it, when I paint by hand it's very streaky. Plus I don't have any white paint.) So I decided just to wipe it down before adding the paper. Luckily, it matches our kitchen cabinets very well!

When I went to hang up the spice rack, I realized that best place for it would be on the side of our fridge, since there isn't really available wall space near the stove. Our fridge was pretty cluttered (see picture below!) so I took this as an opportunity to clean it up, too!


I just took everything off of there and decided what needed to stay. All of the magnets were fun, personal, and colorful, but I think they just made things a little visually distracting. In the future I'd love to add a magnet board to the office, so I could use the magnets in there. I decided just to keep our menu planner and fridge inventories, along with a few wedding invites from friends (and ours, too!) I moved my aprons from the side of the fridge and hung them elsewhere in our kitchen/dining area.


Once everything was clean, I popped some command strips on the back of the shelf and placed it on the side of the fridge! It's so lightweight that I only used 3. For a larger one I'd use more, or even those velcro picture hanging strips, but these work just fine for my shelf.


With the shelf hung, I got out my most used spices and arranged them on it:


But then, because I can't just let things be, I decided the spice bottles needed a little spicing up (har, har)--so I grabbed more colorful scrapbook paper and used my favorite font, Honey Script, to add labels to the front of each! Here they are now, all colorful and happy:


And I still have two cubbies to fill! Exciting!

So, again, here are the befores of the plain ol' spice rack and the messy fridge:


And here are the afters:


I'm already loving how clean the fridge looks and how easy it is to grab the spices! The pegs are a bonus, too--now my measuring cups are close at hand and I have a place to hang our box tops collection & oven mitt without over-cluttering the fridge. And in the future, I plan to grab more of these little shelves--they also look great as craft storage, as Beckie uses them:

{via here}


What do you all think? Anyone have other ideas for how to use these ever-present wooden shelves?


Pin It!

Pin It button on image hover